Bare Metal Kubernetes Cluster
In this blog post, I’ll be detailing the construction of my 3-node Kubernetes cluster on older hardware within my home lab. Come along as I walk you through the process and share the lessons learned in my Kubernetes learning adventure!
The Hardware
I’ve bought 3 old small form factor pc, they are all quad core i5 6500 with 8GB of RAM and 120 SSD. I bought them for 50 euro each, they are cheaper than raspberry pi 4, faster, and you don’t have to deal with arm64 and sd cards, but of course, they take a bit more space :)
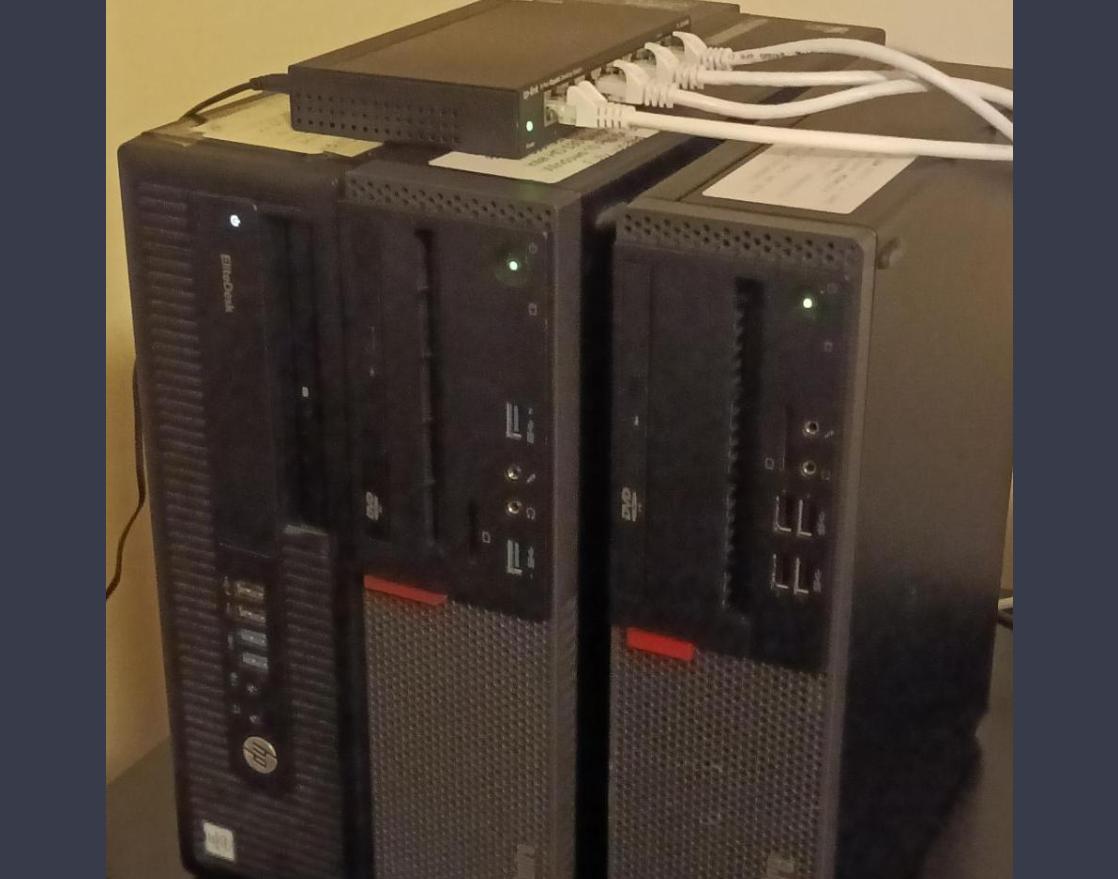
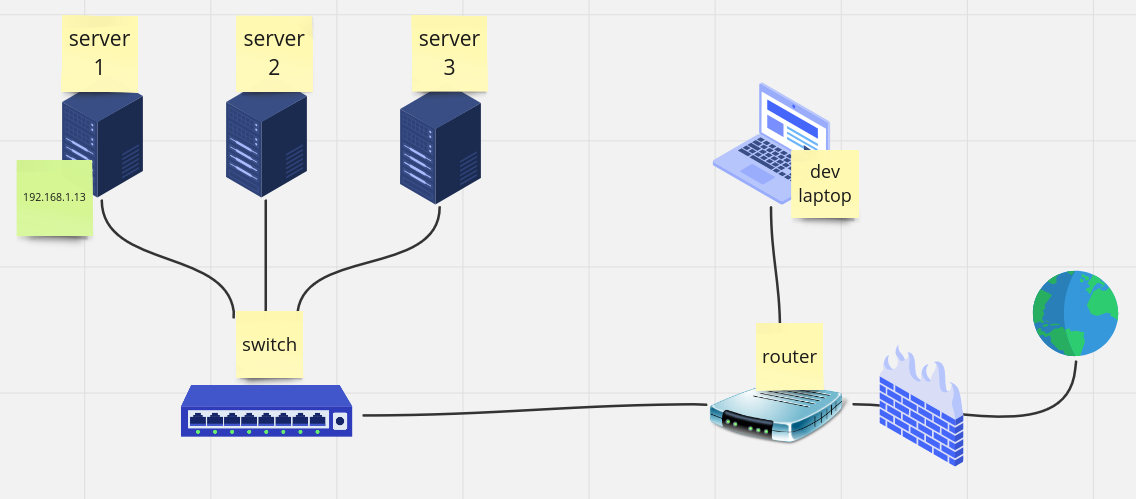
From now on, for simpicity, I will call them server1, server2, server3. All 3 servers are connected to a switch which is connected to my home router
The OS
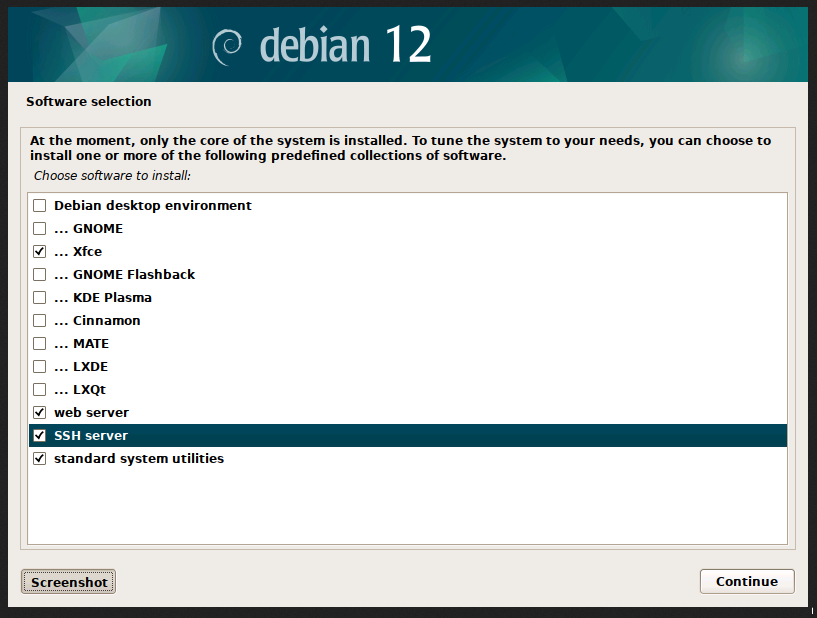
I’ve installed on all 3 servers debian 12 with xfce as desktop environment. I’ve also installed SSH server for ssh connection.
I’ve double checked that I could connect via ssh with the ssh "maciti@192.168.1.13" command from my dev laptop.
And then, because I wanted to be able to connect to them via remote desktop as well, I installed and enabled XRDP
#apt install xrdp -y
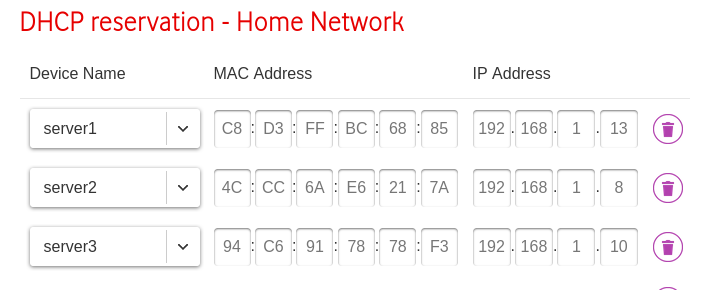
#systemctl enable xrdpto ensure that the IP address didn’t change on all 3 servers I added them on my DHCP reservation list of my router
The Kubernetes distribution
I decided to install k3s as kubernetes distribution. I think at this point, for learning purposes, any would do.
Following the quick start guide k3s quick start I installed k3s on server1 as server node
#curl -sfL https://get.k3s.io | sh -note: I had to install curl, it’s not included in the default debian 12 installation (apt install curl)
after the installation has finished you can check the kube config:
#cat /etc/rancher/k3s/k3s.yamlUsing kubectl get nodes command I could see the node “server1” running as server node

then I installed k3s on server 2 and server 3 as agent nodes
#curl -sfL https://get.k3s.io | K3S_URL=https://192.168.1.13:6443 K3S_TOKEN=mynodetoken sh -where I replaced mynodetoken with the token saved at /var/lib/rancher/k3s/server/node-token</end> (in the server node (server 1))
PROBLEMS THAT I ENCOUNRED:
PROBLEM 1:
k3s agent was not connecting to the server node. In server 1, I had to replace server address in both /etc/rancher/k3s/k3s.yaml and ~/.kube/config from https://127.0.0.1:6443 to https://192.168.1.13 (internal ip address of server 1)
PROBLEM 2:
I had a problem with the installation in one of the agents and I had to re-install k3s. After uninstalling and reinstalling it the agent was not in a ready state.
 Looking at the status of k3s-agent
 systemctl status k3s-agent I saw the follwing error: Node password rejected, duplicate hostname or contents of ‘/etc/rancher/node/password’ may not match server node-passwd entry
I checked all the secrets on server 1 using the following command:
kubectl get -n kube-system secrets NAME TYPE DATA AGE
k3s-serving kubernetes.io/tls 2 19h
server1.node-password.k3s Opaque 1 19h
chart-values-traefik-crd Opaque 0 19h
chart-values-traefik Opaque 1 19h
sh.helm.release.v1.traefik-crd.v1 helm.sh/release.v1 1 19h
sh.helm.release.v1.traefik.v1 helm.sh/release.v1 1 19h
server3.node-password.k3s Opaque 1 17h
server2.node-password.k3s Opaque 1 32mI solved it by deleting the server2.node-password
kubectl -n kube-system delete secrets homenas-vm.node-password.k3sI restarted the k3s-agent…and FINALLY I COULD SEE ALL THE NODES IN READY STATE FROM SERVER 1!!!